Overview of This Article
This article documents my experience recovering a smartphone that stopped displaying after being partially submerged in water for a few hours by replacing the screen and parts.
While there are many repair guides available online, I want to share my thought process leading up to the repair.
I hope this helps others who are struggling with similar symptoms to recover their devices through DIY repair.
Including the cost of tools, the total repair cost was about 10,000 yen.
Considering that repair shops would charge 30,000-50,000 yen,
this is quite an economical solution.
Target Audience
- Those who want to know how to replace the display on a Redmi Note 11 Pro 5
- Those looking to identify the cause of display malfunctions
Background Leading to This Article
Smartphone repair after water damage can be expensive when done at a shop.
For the Redmi Note 11 Pro 5, screen replacement alone costs 30,000 yen.
Repairs involving the motherboard would cost even more.
However, smartphone failures happen suddenly,
and you may not be able to simply abandon your phone
with all your data still inside it.
That’s why I considered, "Could I repair it myself?"
But it’s scary to disassemble precision electronics,
and taking that first step can be difficult.
After actually attempting smartphone repair, what I felt was:
"It’s more manageable than I thought."
Using information available on the internet and YouTube,
I found that even feeling my way through the process was possible.
I wrote this article for those who "want to repair it themselves but are afraid because they don’t know how."
I’ll share the tools, information, steps, and thought process I used for my repair,
hoping it will help with your own DIY projects.
The Issues with My Smartphone
- The screen wasn’t displaying anything at all
- The touchscreen showed no visible response
Honestly, it seemed hopeless.
In this state, the smartphone was completely unusable,
making it difficult to recover or copy any data stored in the phone.
However, with important data still stored in the phone,
I felt I had to find a way to recover it.
By the way, the likely cause of this malfunction was:
"The bottom part of the phone briefly fell into a puddle (partial submersion)."
Fortunately, I discovered that when I pressed and held the power button,
the phone would vibrate (indicating the button was working).
Also, though the screen wasn’t displaying,
the daily alarm would still sound.
Possible Causes of Malfunction
From the observations in the previous section, I could infer the following:
- Something related to the display was broken
- Fortunately, the motherboard was still functioning (the phone responded to buttons and alarms still worked)
Therefore, I decided to first assume the screen was damaged
and attempt to replace it.
Smartphone Screen Repair
Researching Repair Methods
We live in a convenient world where you can find detailed videos explaining how to disassemble specific smartphone models on YouTube.
So, I searched YouTube for "Redmi note 11 pro 5 (model name) display replacement."
I recommend searching in English to find videos from other countries.
I referenced this video:
https://www.youtube.com/watch?v=xeq5MAJsaYk&list=WL&index=2
I researched how to disassemble the phone and replace the screen,
to determine if I could do it myself.
In my case, it seemed doable even for a beginner,
so I decided to purchase the necessary items and give it a try.
Obtaining Repair Tools/Parts
Heat Gun
For the Redmi Note 11 Pro 5,
I needed to separate parts that were attached with adhesive, like the screen and back panel.
So I purchased a heat gun for about 3,000 yen.
You can also substitute a hair dryer for this.
Replacement Screen
I searched Amazon using terms like "Redmi note 11 pro 5 Screen Repair Replacement."
I checked the comments section and chose a product that other users had successfully used for repairs.
I ultimately purchased this replacement screen for about 4,300 yen:
It came with screwdrivers and small tools for separating adhesive joints,
which saved me preparation time and was a good value.
Adhesive (B7000)
You need adhesive to reattach the screen and back panel.
B7000 adhesive seems to be the standard for smartphone repairs, so I used that.
It costs about 500 yen.
Being an imported product, it’s inexpensive,
but has a 1-2 week lead time.
Disassembling the Smartphone & Checking Its Condition
There’s not much to explain here,
just thoroughly watch the disassembly video on YouTube:
https://www.youtube.com/watch?v=xeq5MAJsaYk&list=WL&index=2
Following the video, I removed the back panel.
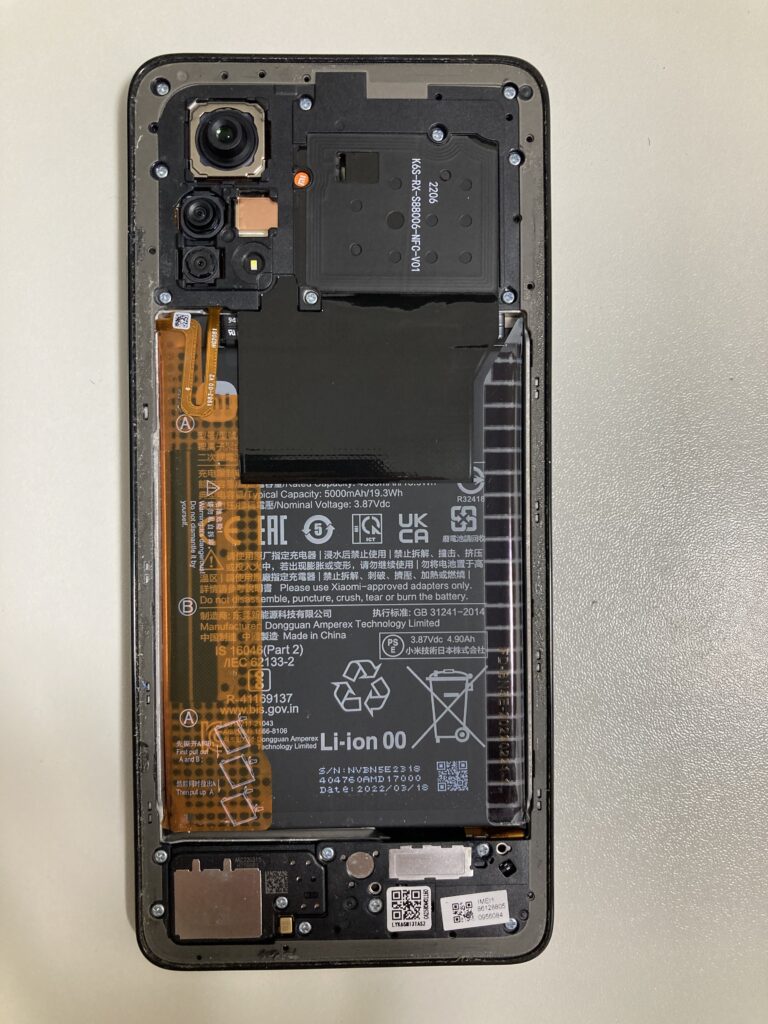
Then removed the screws and cover.

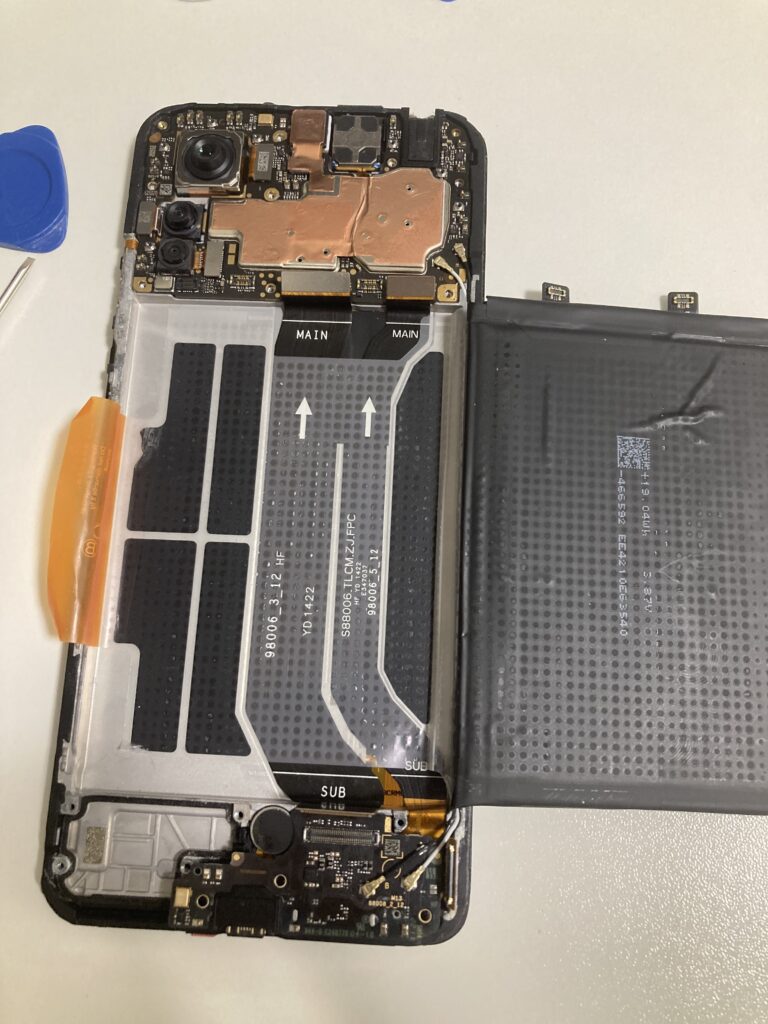
Here’s what it looked like after removing the battery section.
Screen Still Not Working After Replacement
After disassembling the phone and testing with the new screen,
I tried to start the phone.
However, the replacement screen also didn’t display properly.
At this point, I realized my initial hypothesis wasn’t completely correct.
Still, I couldn’t give up, so I continued investigating the cause.
Since my theory that "the motherboard is working, only the screen isn’t displaying" seemed correct,
I examined the motherboard and cables related to the screen.
I discovered that the pins on the connector that joins the screen to the motherboard were corroded,
and some pins had been worn away.
You can see that the pins that should be silver have turned black.

So I investigated whether this part could be replaced.
This cable had what looked like a product number: "S88006-TLCM.Z.J.FPC,"
which I used to search on Google and Amazon.
Looking through the search results, I learned that this part is called an "LCD Flex Cable."
Purchasing the LCD Flex Cable
I discovered that this part was available separately on Amazon,
and finding it orderable, I placed an order.
Being an imported product, it would take 2-3 weeks to arrive,
but I had no choice.
To avoid getting the wrong part, I ordered the same component from two different shops.
Each cost about 900 yen.
Replacing the LCD Flex Cable
Searching for more detailed part replacement videos, I found this one:
https://www.youtube.com/watch?v=Uj5nAs5jBkY&t=2137s&pp=ygUjcmVkbWkgbm90ZSAxMSBwcm8gNWcgY2hhbmdlIGRpc3BsYXk%3D
With a better understanding of how to replace the part,
I attempted to change this component.
After removing the old "LCD Flex Cable" from the device, I installed the new part.
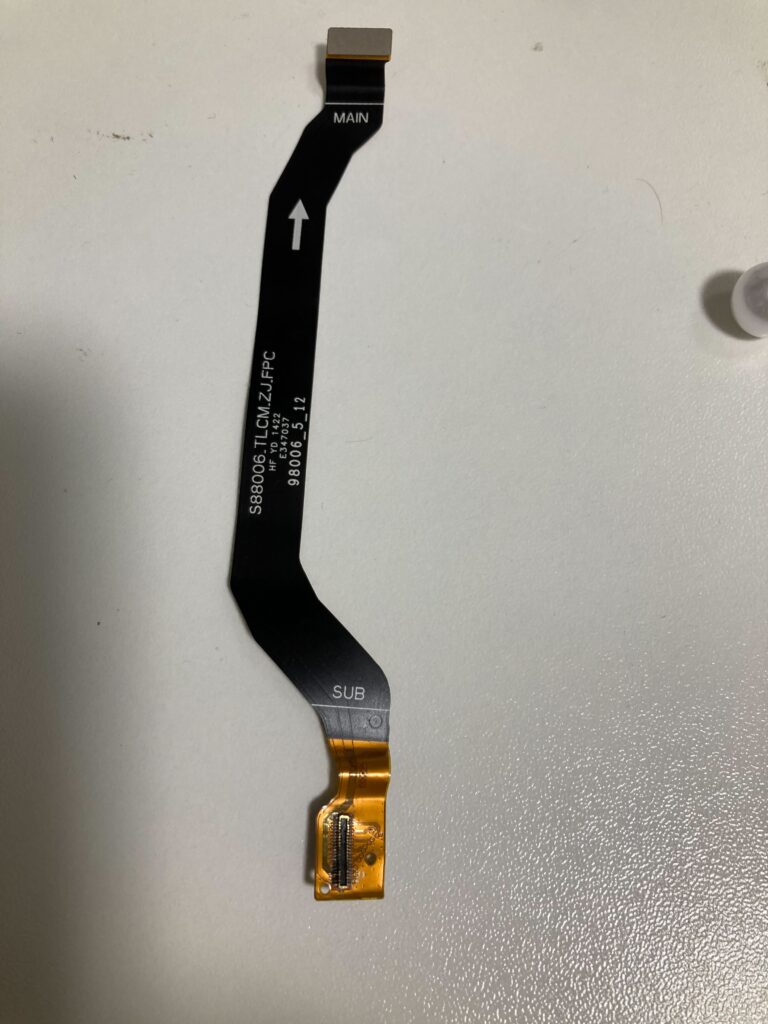
Then, after connecting the replacement screen…
Finally, the phone’s startup screen appeared.
It seems my diagnosis about this part being broken was correct.
Out of curiosity, I tried connecting the old screen to the new LCD Flex Cable.
I thought if the screen worked with just the old display, that would be lucky…
However, the startup screen didn’t appear.
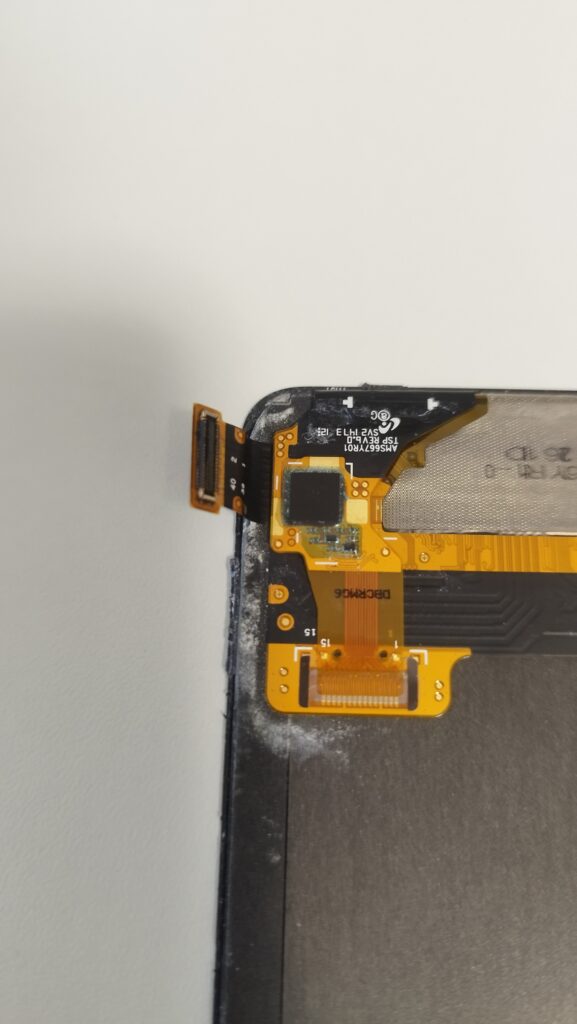
Apparently, the connector on the screen side was also damaged.
I removed the old screen.

You can see that the connector section is corroded here too.
At this point, all that remained was to attach the new screen and reassemble the phone.
※ I was so focused that I forgot to take photos of the crucial step. Below is an image from the product site:

Let’s reassemble the phone while watching the YouTube video.
With this, the phone recovery was finally complete.

Summary
In this article, I shared my thought process leading to the recovery of a Redmi Note 11 Pro 5 whose screen stopped working after partial water submersion.
By repairing it myself, I managed to keep the cost under 10,000 yen.
This repair wasn’t just a simple screen replacement;
since the connector part to the motherboard was also damaged, if I had requested a shop repair,
additional costs would have accrued, likely resulting in an expensive repair (over 50,000 yen).
I’m grateful that in today’s age, we can easily and freely watch various smartphone disassembly procedure videos.
Thank you for reading this far.
