This article introduces the environment setup and configuration for running Selenium from AWS Lambda.
Many people may struggle with the following points:
- How to import external modules into Lambda functions
- Compatibility issues between Selenium and Python versions in Lambda
I thought "It shouldn’t be that difficult," but ended up spending an entire weekend on it. I’m documenting this process to help others avoid the same frustration.
Let’s go through the setup process step by step.
Prerequisites
Here’s the Lambda function we’ll use for testing:
#coding: UTF-8
import os
import time
import pytz
from selenium import webdriver
from selenium.webdriver.chrome.options import Options  # Required to use options
from selenium.webdriver.support.ui import WebDriverWait
from selenium.webdriver.common.by import By
from datetime import datetime, timedelta
import warnings
warnings.filterwarnings('ignore')

CHROMEDRIVER_PATH = os.environ["CHROMEDRIVER_PATH"]
HEADLESS_CHROMIUM_PATH = os.environ["HEADLESS_CHROMIUM_PATH"]

def lambda_handler(event, context):
  options = webdriver.ChromeOptions()
  options.add_argument("--disable-gpu")
  options.add_argument("--hide-scrollbars")
  options.add_argument("--ignore-certificate-errors")
  options.add_argument("--window-size=880x996")
  options.add_argument("--no-sandbox")
  options.add_argument("--homedir=/tmp")
  options.add_experimental_option("w3c", True)
  options.add_argument("--headless")
  options.add_argument("--single-process")  # if enable this option, it doesn't work in local
  options.binary_location = HEADLESS_CHROMIUM_PATH

  driver = webdriver.Chrome(
    executable_path=CHROMEDRIVER_PATH,
    options=options
  )

  driver.get("https://www.google.com/")
  driver.quit()
There are some functions in this method that we’re not using, but I’ll leave them in as they’ll likely be needed for future web scraping with Selenium.
Procedure
I’ll proceed in an error-driven approach so you can experience the same hurdles I encountered.
First, Create a Lambda Function
Create a new Lambda function from "Create function."

The function name can be anything.
Let’s call it "seleniumTest."
The runtime is crucial. It seems Python 3.7.3 has good compatibility with Selenium, so specify Python 3.7 as the runtime.
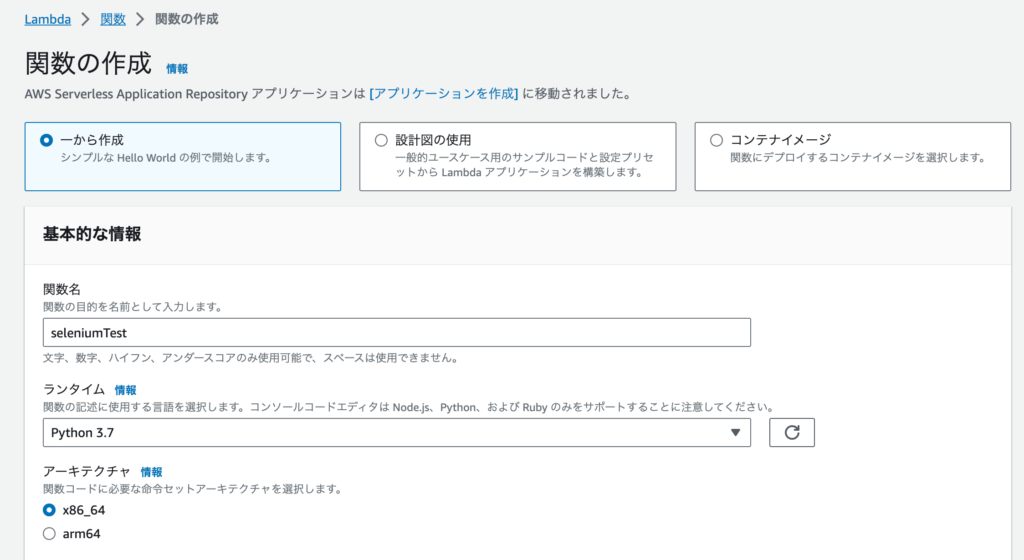
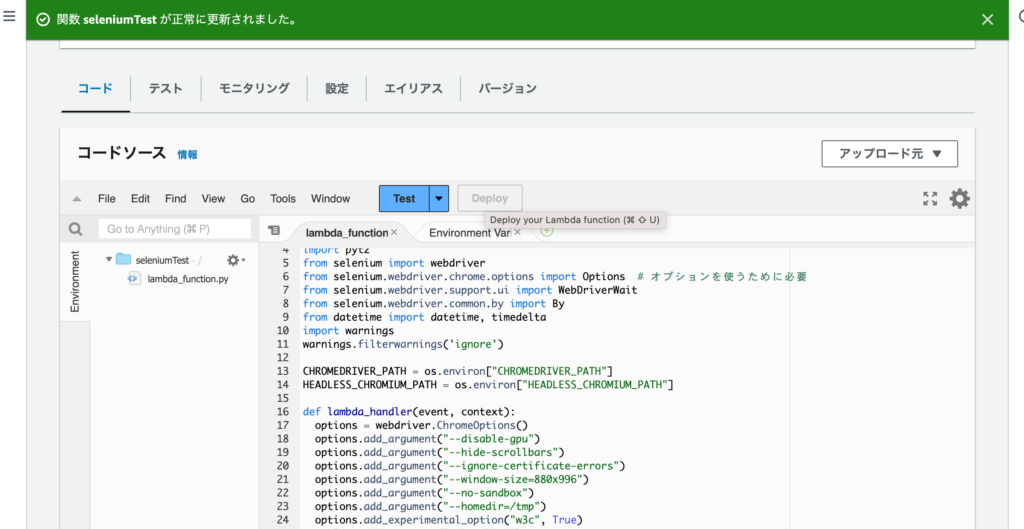
Once the function is created, paste the code from the prerequisites into lambda_function.py.
Click "Deploy" to apply the source code, then select "Test."
Let’s create a test event named "testEvent" to verify that an error appears.
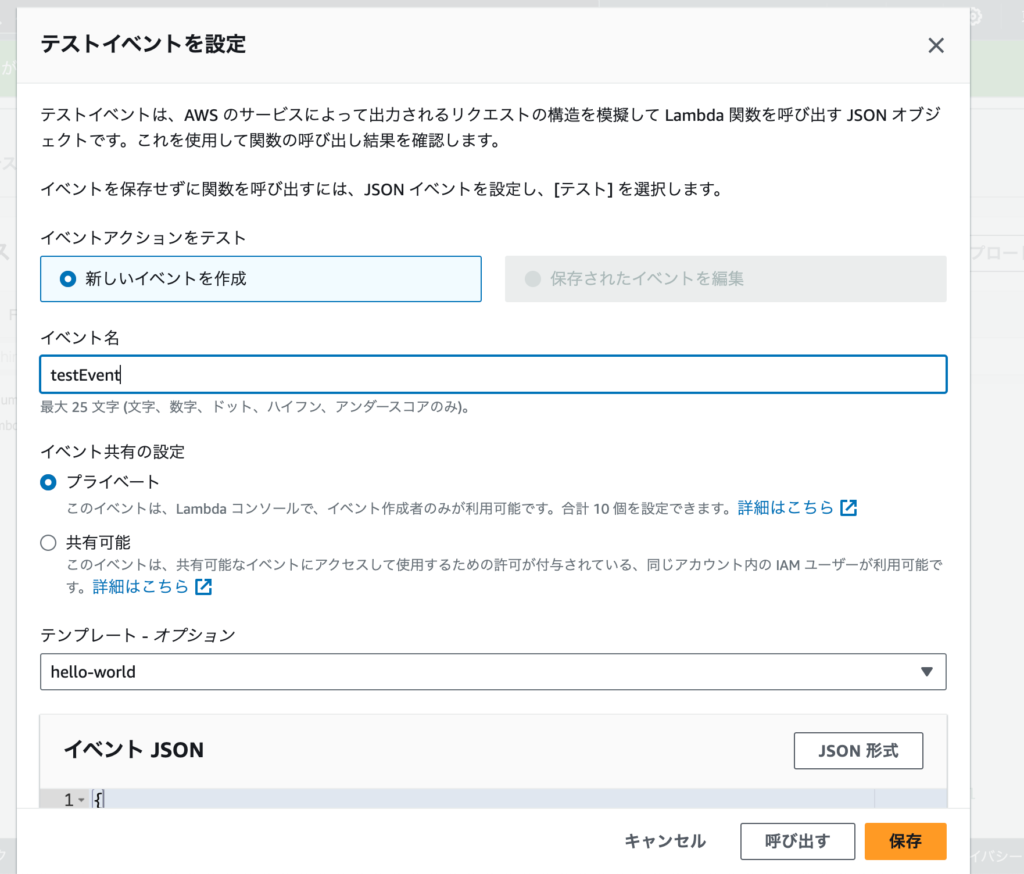
Run "Test" again.
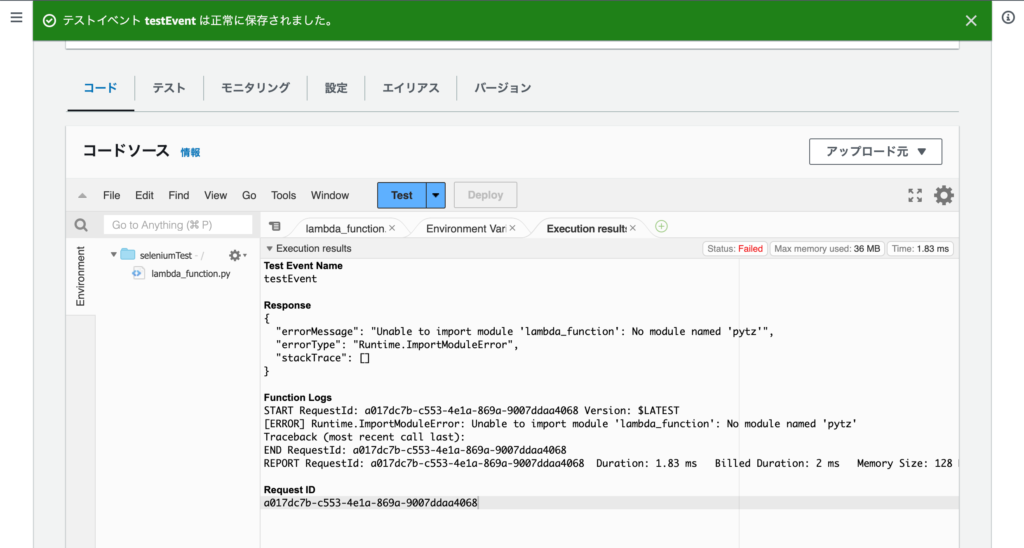
You should see the following error.
This is an expected error since we haven’t imported the modules yet.
This is where we encounter hurdle #1: "How to import external modules into Lambda functions."
There are several methods, but we’ll use Lambda layers to import external modules. This approach allows us to reuse the same layers when creating other Lambda functions, making environment setup much easier.
Using Layers to Import Related Modules
We’ll create a zip file with the related modules installed in a local environment and upload it to Lambda.
To avoid errors dependent on local environments, we’ll start a Python container with Docker and create the necessary files there.
(If you can’t run Docker in your local environment, please make the necessary preparations separately.)
First, let’s pull the Python Docker image to our local environment and start it:
# Pull the Docker image locallydocker pull python:3.7# Start the Docker containerdocker run -itd –name python3.7 python:3.7# Enter the Docker containerdocker exec -it python3.7 /bin/bash
Execute the following commands inside the Docker container to install the necessary packages and compress them into a zip file:
# Create a working directory
cd var/tmp
mkdir python# Install the necessary packages
# The selenium version is important
# We’ve confirmed that 4.1.0 works, so we’ll specify that version
# Add any other packages you need here
python3.7 -m pip install selenium==4.1.0 urllib3==1.26.15 pytz -t python/# Install zip command (it’s not included by default)
apt update && apt install -y zip# Compress into a zip file for Lambda installation
zip -r layer.zip python
After creating layer.zip in the Docker container, copy it to your local environment.
(Run the following command on your local machine)
docker cp python3.7:/var/tmp/layer.zip ./
Now you should have the layer.zip file in your local environment.
Next, create a layer in Lambda.
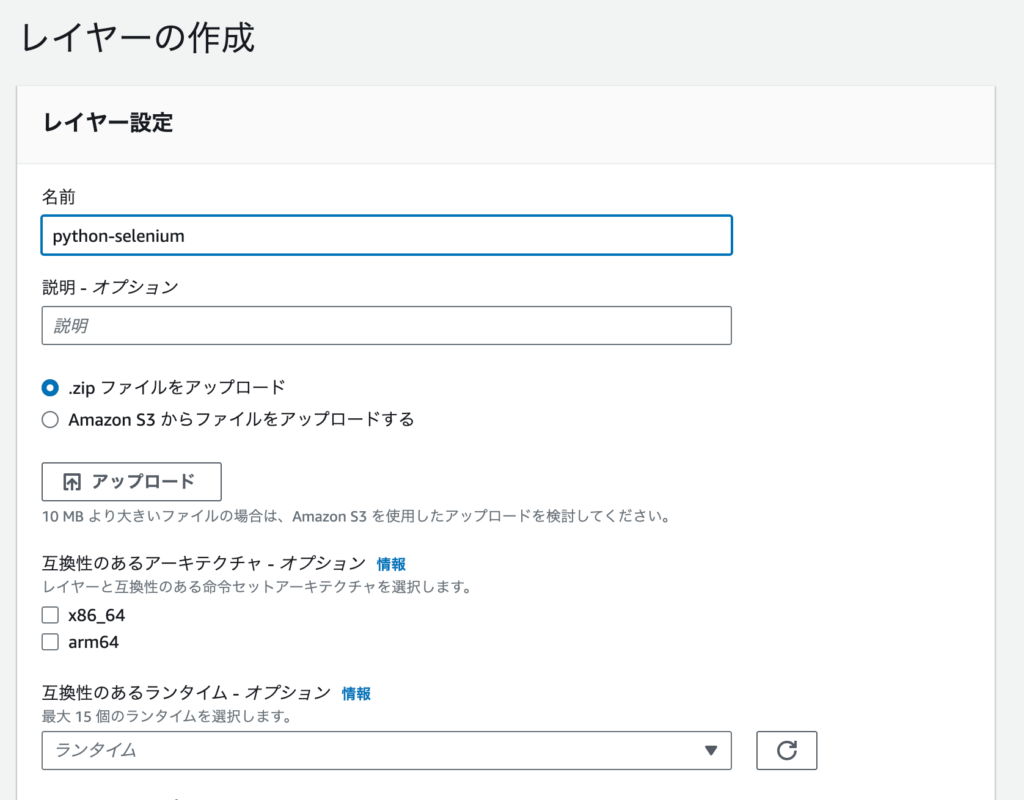
Select "Create layer."

Set an appropriate layer name.
Let’s call it "python-selenium" for now.
Upload the zip file we created earlier.
For compatible runtime options, specify "python 3.7."
In the lower part of the Lambda function screen, there’s a "Layers" section. Select "Add layer" from here.

Configure the layer we just created.
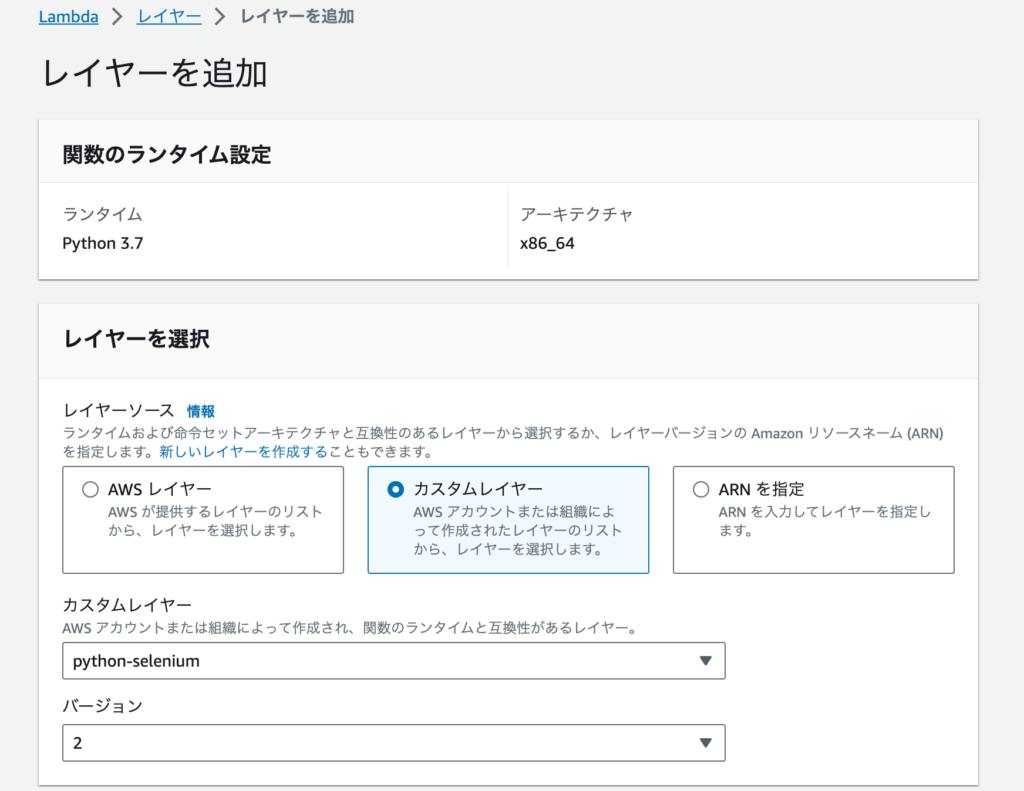
Let’s see what happens if we run Lambda at this point.
Press "Test."
We got another error.
This is because we haven’t set the environment variables required by the program.
Let’s set up these environment variables that we’ll use later.
Test Event Name
testEvent

Response
{
  "errorMessage": "'CHROMEDRIVER_PATH'",
  "errorType": "KeyError",
  "stackTrace": [
    "  File "/var/lang/lib/python3.7/imp.py", line 234, in load_modulen    return load_source(name, filename, file)n",
    "  File "/var/lang/lib/python3.7/imp.py", line 171, in load_sourcen    module = _load(spec)n",
    "  File "<frozen importlib._bootstrap>", line 696, in _loadn",
    "  File "<frozen importlib._bootstrap>", line 677, in _load_unlockedn",
    "  File "<frozen importlib._bootstrap_external>", line 728, in exec_modulen",
    "  File "<frozen importlib._bootstrap>", line 219, in _call_with_frames_removedn",
    "  File "/var/task/lambda_function.py", line 13, in <module>n    CHROMEDRIVER_PATH = os.environ["CHROMEDRIVER_PATH"]n",
    "  File "/var/lang/lib/python3.7/os.py", line 681, in __getitem__n    raise KeyError(key) from Nonen"
  ]
}
Setting Environment Variables
Let’s set environment variables for the Lambda function.
I’ve extracted these as external variables because I want to switch values between local testing and AWS execution.
Go to Lambda’s "Configuration" → "Environment variables."
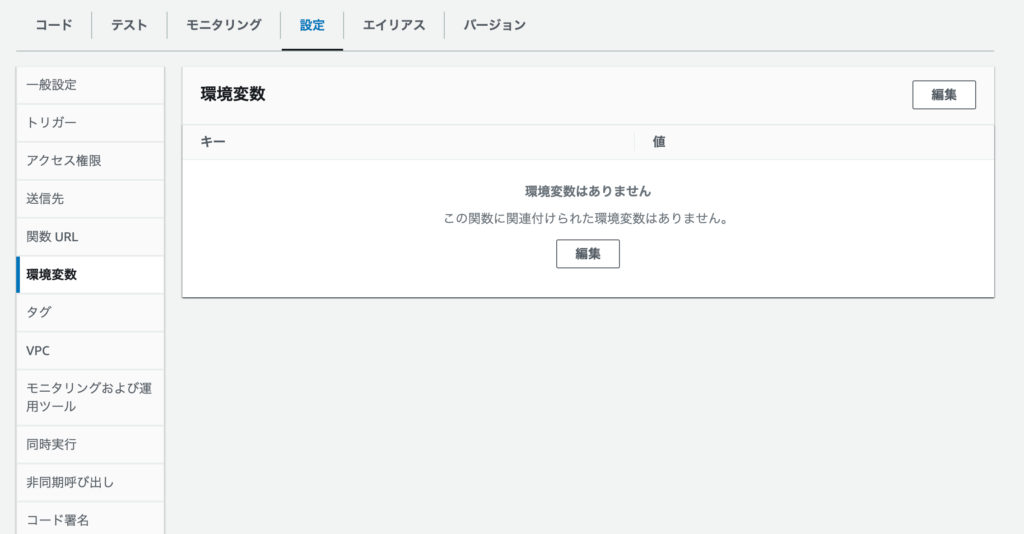
Register the following keys and values.
The paths set as values need to match those specified in later steps, which is why we’re using these specific paths.
|
Key
|
Value
|
|---|---|
| CHROMEDRIVER_PATH | /opt/chromedriver |
| HEADLESS_CHROMIUM_PATH | /opt/headless-chromium |
Let’s run "Test" again.
The error has changed.
We’re getting an error because we haven’t imported the chromedriver that Selenium needs to launch.
Test Event Name
testEvent

Response
{
  "errorMessage": "Message: 'chromedriver' executable needs to be in PATH. Please see https://chromedriver.chromium.org/homen",
  "errorType": "WebDriverException",
  "stackTrace": [
    "  File "/var/task/lambda_function.py", line 31, in lambda_handlern    options=optionsn",
    "  File "/opt/python/selenium/webdriver/chrome/webdriver.py", line 73, in __init__n    service_log_path, service, keep_alive)n",
    "  File "/opt/python/selenium/webdriver/chromium/webdriver.py", line 90, in __init__n    self.service.start()n",
    "  File "/opt/python/selenium/webdriver/common/service.py", line 83, in startn    os.path.basename(self.path), self.start_error_message)n"
  ]
}
Next, let’s install chromedriver.
Installing Chromedriver and Adding It to the Layer
# Install Linux chrome driver
# There are also version compatibility issues, so let’s use the version installed belowcurl -SL https://chromedriver.storage.googleapis.com/2.37/chromedriver_linux64.zip > chromedriver.zipcurl -SL https://github.com/adieuadieu/serverless-chrome/releases/download/v1.0.0-37/stable-headless-chromium-amazonlinux-2017-03.zip > headless-chromium.zip
# We want to combine the two files, so let’s extract them first
unzip -o chromedriver.zip -d .
unzip -o headless-chromium.zip -d .# Remove garbage filesrm chromedriver.ziprm headless-chromium.zip# Compress with zip to add to the layerzip headless.zip chromedriver headless-chromium
Once this is done, add "headless.zip" to the layer in the same way as before.
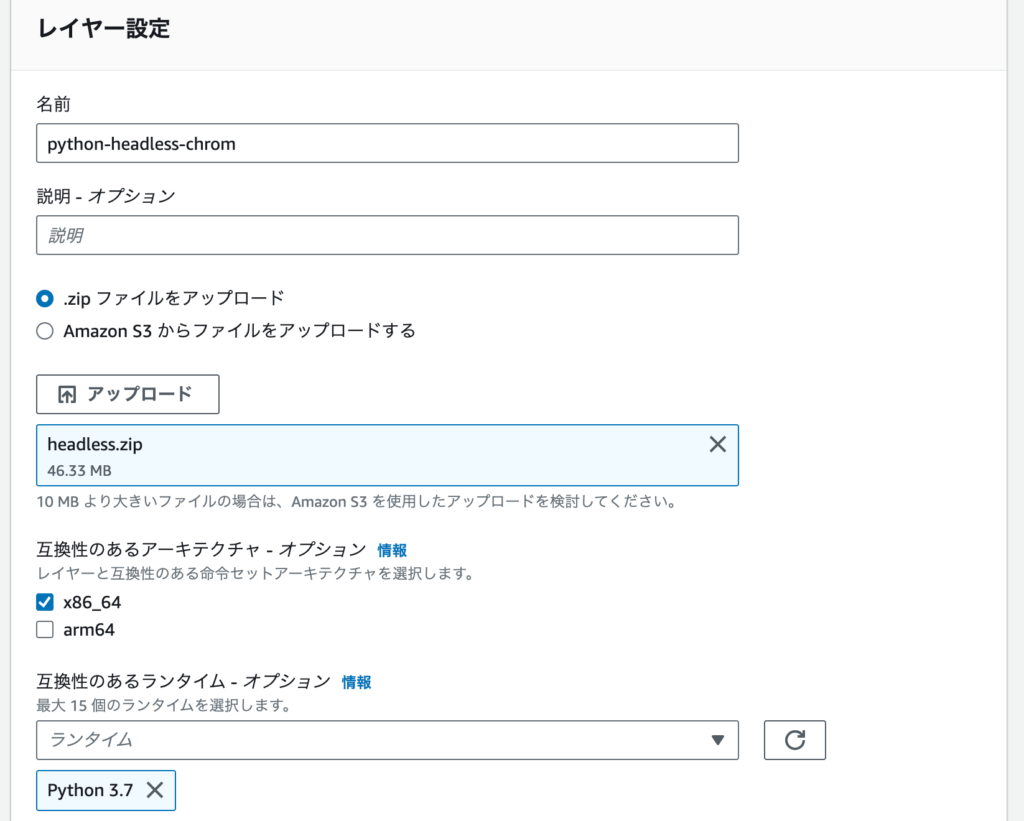
At this point, you should have two layers added: "selenium + packages" and "chrome driver."

Let’s run "Test" again.
The error has changed.
Lambda has a default timeout of 3 seconds to prevent long-running executions. We need to set a longer timeout.
Test Event Name
testEvent

Response
{
  "errorMessage": "2023-10-24T09:51:22.560Z 4dfacbfb-b7f4-48a9-9a0b-9c46b2d086c6 Task timed out after 3.01 seconds"
}
Several more settings will be covered in the next section.
Configuring Additional Settings
First, let’s solve the timeout error by setting a timeout value.
Go to "Configuration" → "General configuration."
Edit the timeout value.

Let’s set it to 30 seconds for now.
Run "Test" again.
We got another timeout.
Test Event Name
testEvent

Response
{
  "errorMessage": "2023-10-24T09:55:22.997Z 8dc756b9-5599-4b7a-8c6f-f3119f83c93d Task timed out after 30.06 seconds"
}

Function Logs
START RequestId: 8dc756b9-5599-4b7a-8c6f-f3119f83c93d Version: $LATEST
2023-10-24T09:55:22.997Z 8dc756b9-5599-4b7a-8c6f-f3119f83c93d Task timed out after 30.06 seconds

END RequestId: 8dc756b9-5599-4b7a-8c6f-f3119f83c93d
REPORT RequestId: 8dc756b9-5599-4b7a-8c6f-f3119f83c93d  Duration: 30060.24 ms   Billed Duration: 30000 ms   Memory Size: 128 MB Max Memory Used: 128 MB Init Duration: 234.73 ms
Pay attention to this error:
Lambda has allocated 128MB of memory, and it’s using all 128MB.
Memory Size: 128 MB Max Memory Used: 128 MB Init Duration: 234.73 ms
Since we’re starting Chrome in the process, it will consume a lot of memory.
This appears to be the bottleneck.
So let’s increase the memory allocation.
Just like before, press the "Edit" button in general settings and increase the memory allocation.

Let’s increase it to 1024MB (1GB) for now.
After making the change, run "Test" again.
Finally, it completed successfully.
Monitor memory consumption and adjust if you think it’s too high.
(Memory consumption will vary depending on what you want to do, so adjust accordingly)
Test Event Name
testEvent

Response
null

Function Logs
START RequestId: ea543588-dad1-47d5-bf5d-2334ab113825 Version: $LATEST
END RequestId: ea543588-dad1-47d5-bf5d-2334ab113825
REPORT RequestId: ea543588-dad1-47d5-bf5d-2334ab113825  Duration: 3937.23 ms    Billed Duration: 3938 ms    Memory Size: 1023 MB    Max Memory Used: 227 MB Init Duration: 200.19 ms
This completes the environment setup.
I referred to the following articles during this setup.
Thank you.
Since you can’t see the browser in action, you’ll need to launch Python locally for debugging.
If you want to run Lambda locally, the following article will be helpful:
https://gonkunblog.com/local-lambda-for-python/1786/
If you’re having trouble installing Python 3.7.3, please check the following:
https://gonkunblog.com/python-3-7-3-install-error/1755/
Summary
In this article, I’ve documented the error-driven process of setting up Selenium to run from Lambda.
What took me 2 days will hopefully take you just about an hour to implement.
I may have skipped some explanations, so if you have any questions, feel free to DM me on Twitter.


